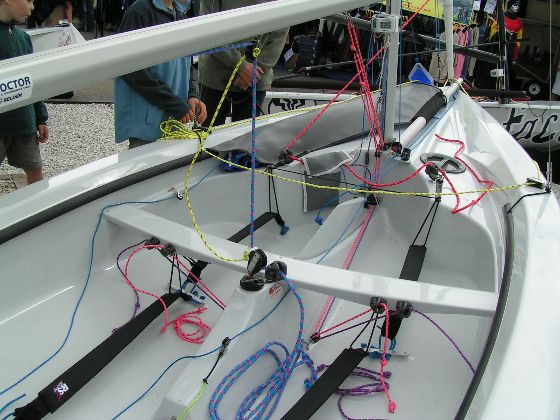
If you have not got a gybing strop on your boat then fit one. It is essential. It is a length of rope that hangs down about 12-18 inches from the boom and is attached at the same place as the front mainsheet block. The bottom of the strop has a loop that loops around the mainsheet. A couple of knots or bobbles will help your grip on it. They are not going to like hearing this but the helmsman holds the key to a perfect gybe! The speed with which yo enter the gybe and the amount by which you alklow the boat to round up after the boom has crossed over affect the success of the gybe fundamentally.
There is less boat speed that with faster asymmetrics. This means that heading dead downwind in the middle of the gybe causes less of a reduction to the apparent wind. Therefore there is more force acting on the mainsail during the gybe than there would be on faster boats.
No loss of boat speed and the kite filling as soon as possible after the gybe. Oh� and no capsizing!
Check you are not about to gybe into someone down under your spinnaker!
Make sure you are holding the tiller in the way you find it easiest to gybe. For most of us this means holding it in the "dagger" position rather than the "pan-handle" position. Make sure the boat is travelling reasonably fast. In moderate wind strengths where going slightly higher may cause a marked increase in boat speed it may help to head up slightly.
Pre-set the jib. First pull the new jibsheet until the bottom corner of the jib touches the mast and cleat. Then uncleat the old sheet. It is essential to not loose any power out of the kite whilst doing this. Most especially don't let it flap! This is a key time to keep the speed on.
Lean the boat to windward to initiate the turn. The degree to which you do this is governed by the wind strength. In light winds it is a fairly significant roll to windward. It is important not to lean across to leeward (disturbing the boat balance) to grab the gybing strop before initiating the turn. The angle of turn should not be too sharp so that the boat slows down because of the sudden change of direction. It should however be quick enough to get back on the wind without loosing any boat speed either. You should aim to steer the boat into the gybe entirely by moving weight in the boat.
Stand up as you initiate the turn, and don't sit down until the gybe is finished. Pulling the boom over at the right time is critical in the RS200 once it becomes breezy. If you leave it too late, the sudden increase in power when the boom comes over may well make the boat capsize to leeward if you are already starting to go high . Grab the mainsheet down near the block and give it a sharp pull in. In a light breeze this may be enough to flick the boom across, but if it is any windier then combine this pull with grabbing the gybing strop in the same hand. Pull the boom across earlier rather than later.
Your main aim is to get the kite across and filling on the new side as soon as possible. It pays to start sheeting in on the new side just before the boom has come across, especially in lighter winds. The last minute flick of the old sheet just as the boat gybes seems to be less important on the RS200 with its small kite than on bigger asymmetric dinghies.
Troubleshooting
I don't seem to be able to get the kite filling quickly after the gybe...
Try gybing the spinnker earlier. In light breeze we have it completely gybed
at about the time the boom starts to come across. That way it fills instantly.
It is important not to let the sheets go loose through the gybe or you may find the leach of the spinnaker blowing around in front of the luff.
The boat has centrifugal force that is throwing the rig out of the turn and the force in the mainsail on the new leeward side will exacerbate that. These forces will be trying to make the boat roll to leeward and spin up into the wind.
The main role is getting the kite filling and set. Watch it is not oversheeted as that markedly decreases its effectiveness and can tip the boat in. Your secondary role is boat balance. It usually pays to know exactly where you are planning to sit after the gybe. That way the helm can watch you move and do the majority of the balancing. If the boat rolls to windward then be ready to stop it, and most importantly be ready to lean out hard if the boat looks like capsizing to leeward after the gybe. In our boat the crew ALWAYS sits on the new windward side whatever the wind-strength as that gives the best vision of the spinnaker and makes it easy to lean out if necessary. The helm knows exactly where the crew's weight is going and can balance accordingly. It also allows for going quite high out of the gybe and getting speed on quick.
Aim to head up onto the wind relatively quickly after the gybe, but if it is breezy or you feel the gybe is not going well then be ready to head up more slowly. Sometimes it pays to steer a slightly S-shaped course through the gybe so that you bear away again slightly as the main fills on the new side. This helps counteract some of the forces mentioned above.
Watch where the crew's weight is and be ready to balance the boat either way. You should be on your feet and mobile.
Keep steering with your hand behind your back until the gybe has finished. If you are finding problems with this then practice gybing and steering with your hand behind your back for the first 50 yards.
Power up as soon as possible. Aim to go high for speed initially so that you can get low with speed rather than just pointing low and going slowly!
Sheet in on the new mainsheet if necessary and possibly give a small pump to get the boat going.
Concentrate on maximum pull from the kite once the balance is established
Try pulling the new sheet in earlier. In a lighter wind practice pulling it in too early before the main has gybed. You will see what you are aiming for�. the kite just snaps full and sets as soon as the boat heads up. Now try finding the balance between when you pull the kite around and how well you can get it to set.
Don't let the old spinnaker sheet go, or ease it too far. If the kite is getting wrapped at the front then try giving the old sheet a final short tug before you start sheeting on the new side.
Best of luck
Malcolm Morley
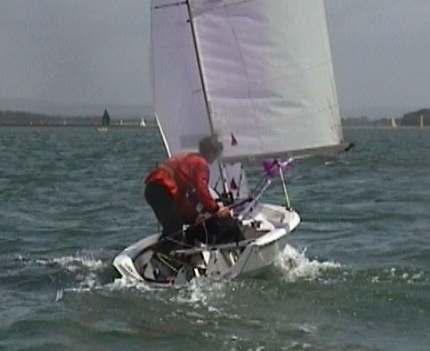
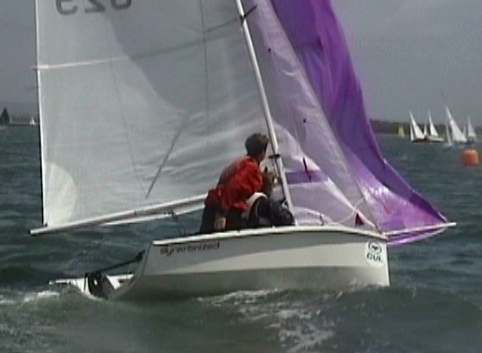
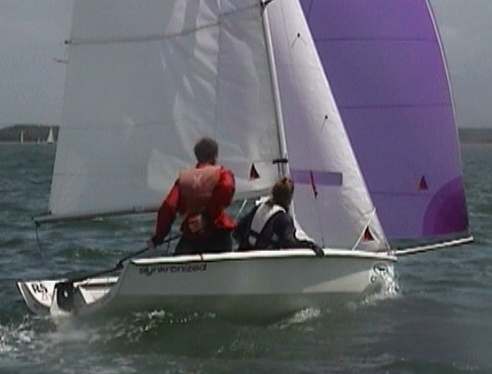
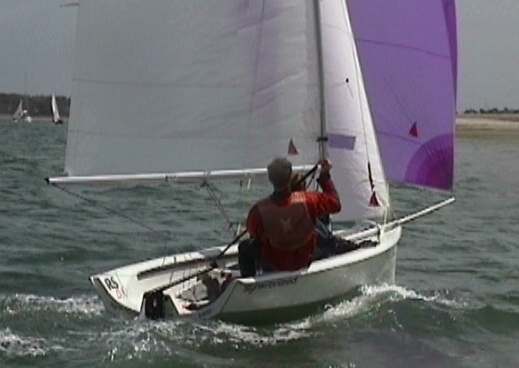
Pictures of Lee Sydenham and Anne Vaudry
Having crewed for Jim Hunt in Enterprises and survived crewing for Greg O Brien; Nikki Cook has been recognised as a top crew in much demand. She is also well known for gossiping and a wicked sense of humour. She won the 1999 RS200 Nationals with Geoff Carveth. There is much for the crew to do in a 200 and the crew/helm have to work hard together to get the best of the boat. Here Nikki gives us her thoughts on crewing a 200.
Quickly crack off the jib and re-cleat it so that it is set and pulling and you don�t have to waste time after the spinnaker is up.
Pass the spinnaker sheet to the helm so that he can control it as you hoist and hopefully prevent it twisting.
Stand facing forwards in the boat, never sit whilst hoisting. (Your boat will need a free floating block just behind the cleat for the crew to hoist facing forward, see the article on making your RS200 race fit..ed)
Pull up the spinnaker, trying to pull to shoulder height with each pull, which is quicker than lots of short pulls. It�s really important to make sure it�s all the way up first time as it wastes time to go back into the boat to re-hoist and requires a lot of strength with the kite set. Also a partially hoisted spinnaker will be more likely to capsize you to leeward.
Top tip - put a florescent marker on the halyard where it enters the cleat with the kite fully up, then you can tell when the spinnaker is right up.
Once the spinnaker is hoisted it�s important to get it working straight away in order to create some space between you and the boat behind. Once there�s clear air and the boat is under control reset jib or control lines as necessary. Doing this straight away may slow you down allowing other boats to sail other the top of you.
If on starboard lay-line in light airs, start hoisting the spinnaker as you approach the mark so that you�re ready to accelerate away as you round the mark.
If on the starboard lay-line in strong winds, let the jib off slightly, but keep weight aft and lean out as necessary. This keeps the bow out of the water so that the helm can control the boat. If you move into the centre of the boat before they�ve born off, the boat is harder to steer and you may hit the mark or loose control of the boat.
Whilst the spinnaker is up you need to do a quick eyeball check that no ropes are potentially twisted it�s better than finding out mid gybe!
Before gybing quickly re-sheet jib on other side then take up slack in new spinnaker sheet.
As boat gybes, pull spinnaker across quickly so that there isn�t time for it to develop a twist. Be careful not to over sheet it.
Hope that Geoff is at the back of the boat not my husband! (Sorry cookie, I do accept 50% of the blame each time we capsize!)
Constantly keep your eye on the spinnaker and keep playing it. I usually let the luff of the spinnaker curl 2 inches to ensure that it is pulling maximally. It�s important that it is not in too tight.
In light winds I prefer to sit to windward to have a better view of the spinnaker, but it depends on the helm!
I�m far more familiar with Enterprises which are really quick, if anyone knows how to roll tack RS 200s please let me know!
I tend to do a slow roll to windward, but not too much roll as it�s hard to clear the water quickly if you take any on board.
I pull the jib across midline quickly but then slowly pull it in to set it as the boat flattens out. This allows you to accelerate out of the tack. Cleating it tight too quickly can stall the boat.
Watch fore and aft position so that the bow doesn�t dig in too much.
As wave approaches move upper body back a bit as go up the wave and move forwards to accelerate the boat down the face of the wave taking care not to dig the bow into the face of the oncoming wave.
Give one pull on the spinnaker whilst on the wave to encourage planing. Helm should trim main at same time.
The obvious things like course, starting sequence, penalty taking, finishing sequence, tally system etc. Getting drinks and knowing what snacks your helm likes in between races
i.e. Geoff likes bananas
Greg � it has to be Mars bars!!!
Keep a commentary going on any areas of the course that looks to have more wind.
Any boats coming up on starboard, whether it�s better to tack or duck behind them.
Also what�s beyond the starboard boat, as it may be better to tack to remain in clear air than duck the boat to stay on a lift but get buried in a pack of boats with no clear air.
Any port boats as the helm may prefer to call them to carry on rather than tack and cause you to tack.
Any big waves as the helm needs to bear off rather than hit it head on and fill up with water.
Any changes in compass readings.
Any sudden knocks in the wind that may have hit a boat in front.
Obviously keep the boat flat whilst going up wind, but be careful when leaning out that you don�t obscure the helm�s view of the bow of the boat. So if the wind drops slightly stay flat but slide your bum in rather than sitting bolt upright and getting in the way.
Quick check of all ropes and blocks, then catch up on GOSSIP !
We have all done it�� sailing along scooping in water over the bow as we cross every wave. Each wave sinks the boat a little more, until you are gunwale deep in water. It is possible to sail in waves and keep the boat dry.
This is the most tricky time to keep the boat dry. Indeed there is only one real time when things might get hairy going down-wind and that is the set, which I will mention later. The 200 has fairly narrow bows and no traditional foredeck, a combination that makes for a potentially very wet boat. Any wave that breaks over the bow will spill all the way down into the hull. The water may even stay on the foredeck for a while, holding the bow down, making the chance of another wave over the bow even higher. As soon as you start to get water in the boat a few things happen; you slow down, the self bailer works less efficiently, and therefore you fill even more quickly. You will find that easing the sheets and trying to increase speed is unlikely to make a big difference as the 200 doesn�t significantly increase speed, and you need to luff up and pinch over the waves.
There are no special tricks to keeping the boat dry. All you need is a nice smooth rhythm and coordinated movement of helm and crew.
Sailing along close hauled (F3-4, 3-5 foot waves) the first thing you notice is the pitching of the boat (fore/aft and up/down), if you don�t do anything other than sail in a straight line you will find that this pitching allows about 1 in 3 waves over the bow. This is where the trouble starts as it soon becomes every wave! Two things reduce the chances of a wave coming over the bow, the first thing is to alter the natural pitching of the boat and second thing is steering.
First I will talk about altering pitching. The helm and crew should sit tightly together, with the crew about 15-20 cm behind the shrouds. Sitting close doesn�t reduce pitching but it does mean that it easy to make coordinated movements as you can feel what each other are doing. The crew's main job is to look ahead and search out that 1 in 3 or so wave that looks like trouble and tell the helm it is coming. That alerts everyone to what is happening and helps coordinated movement. As the bow lifts up the wave you should be sitting in a neutral position (for the weather conditions above this means sitting out hard). Then as you get to the crest of the wave you should roll your shoulders forward and this will help force the boat down the wave. You will now see a lovely wall of water heading for the bow, by rolling your shoulders back the bow will lift up out of the water a little. Now relax back to the neutral position. The roll forward should be quite gentle with the roll back being quite rapid.
Just moving around the boat won�t be enough to stop the water from spilling in, you have to steer the waves as well. Taking the same situation as above, when climbing up out of the trough you need to bear off a little. This helps to power the boat up and get it accelerating out of the wave. At the crest start to head up to your normal close hauled course, about the same time you are rolling your shoulders forward. Now you are heading down the back of the wave it is time to start to heading up. It really pays in the 200 to have slight windward heel and be pinching hard when you get into the trough. As you hit this new pinching course you should be just about ready for the quick flick of your shoulders towards the stern. This helps the boat bear off and lifts the bow. The water then slides along the windward gunwale and not up onto the foredeck. As soon as you are out of the trough bear off and let the boat accelerate.
When it is wavy it doesn�t seem to pay to try and go really high, a nice smooth zig-zag course works very well. If you find a couple of waves come over the bow, don�t worry as you can sail the boat dry. The zig-zag technique works for all sizes of waves all you have to do is adjust the timing. As the waves get shorter then you have to be quicker with helm movements, though they can be less drastic. Also, when the waves are smaller you can reduce the amount of body movement In big lovely long waves you can use slow large movements of the rudder to steer the boat over the waves.
Setting the kite in waves can be quite tricky, but a couple of things can make life a lot easier. The first thing is try and be prepared for the set, do as much as you can in the last few boat lengths to the top mark. You should ease the out-haul and kicker as you approach the mark, make sure you ease the cunningham. The crew should have brought the spinnaker sheet over and laid it over the thwart for the helm. When you get to the mark bear off onto a very broad reach. You will find that you catch the waves up very quickly and the danger of nose-diving is very high. Speed is of the essence here, the quicker the kite is up and pulling the better you are, hence all your preparation. The crew should start to pull the kite up as soon as the boat has become stable and at the same time the helm pulls in on the sheet. It should take no more than four or five really big pulls on the halyard for the kite to set. When the kite is up the helm eases the sheet and gives it to the crew. Now all you have to do is settle down and enjoy the ride.
Make sure you gybe going flat out and you should be OK. For the drop, give the helm the sheet and pull the kite in as quickly as you can. If you have got a system that allows the crew to drop and set from behind the centerboard case then do these maneuvers from there. Again, for the drop speed is important, so be prepared. As the speed comes off the boat slows down and the nose goes in. Be prepared for this and complete the drop quickly and all should be fine.
Enjoy those windy wavy days,
Steve Dunn
Using the Running Pole
The running pole is not the best loved piece of kit on our boat! However we do find it quick on runs until we plane, so we have kept trying and now often manage without major knitting. Here�s how we do it, in case it�s any help.
First, some notes on how we sail the boat - as other set-ups may need something different:
1. We are on a single patch kite. I think 2 patch may be easier for getting it down.
2. We have rerigged our sprit tack line and check lines as one, as on the new 2 patch system.
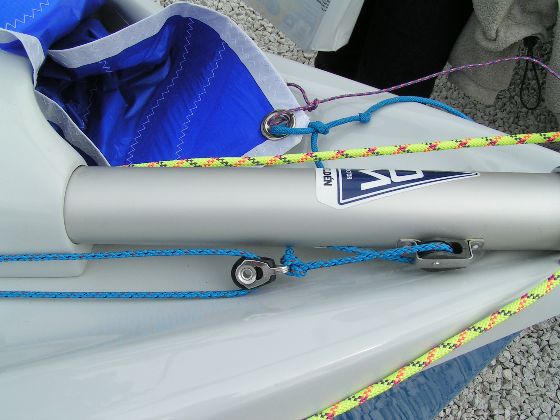
3. We have removed the long elastic from the boom and have the running pole loose. It stows through small loops near the back of the boom and hooks to the original piece of elastic near the front of the boom.
4. When running, the crew sits on the windward gunwhale touching the shroud and the helm on the thwart to leeward.
5. We always go into normal reaching mode with sprit extended after hoisting and before dropping as we always get a massive knot otherwise.
Here is our action log (i.e. what we wished we�d done afterwards):
|
Crew
|
Helm
|
|
After hoisting in reaching mode: |
|
| 1. Ease halyard. | 1. Pull on check line. |
| 2. Put the check line knot in the �V�. Cleat halyard. | |
| 3. Goosewing with weather sheet | Tension halyard. |
| (Get speed on - on short legs you won�t want to bother with the pole.) | |
| 4. Pass pole from boom to crew.* | |
| 5. Put pole onto windward sheet and mast. | |
|
Gybing (if your pole is free in the boat): |
|
| . | 1. Gybe the jib sheets |
| 2. Pull in new spinnaker sheet. | 2. Gybe the main. |
| 3. Put pole onto new sheet, take off old sheet and put onto mast. | 3. Pull on windward sheet and set kite. |
|
Gybing (if you use the elastic system supplied with the boat): |
|
| 1. Remove the pole and pass it back down the leeward side of the boom. Take care to pass it the right side of the shrouds (it may help to sheet the main in very slightly) | 1. Gybe the jib sheets. |
| 2. Pull in new spinnaker sheet and goosewing | 2. Gybe the main. |
| 3. Pass pole from boom to crew.* | |
| 4. Put pole onto windward sheet and mast. | |
|
Changing from Running to Reaching mode before the drop: |
|
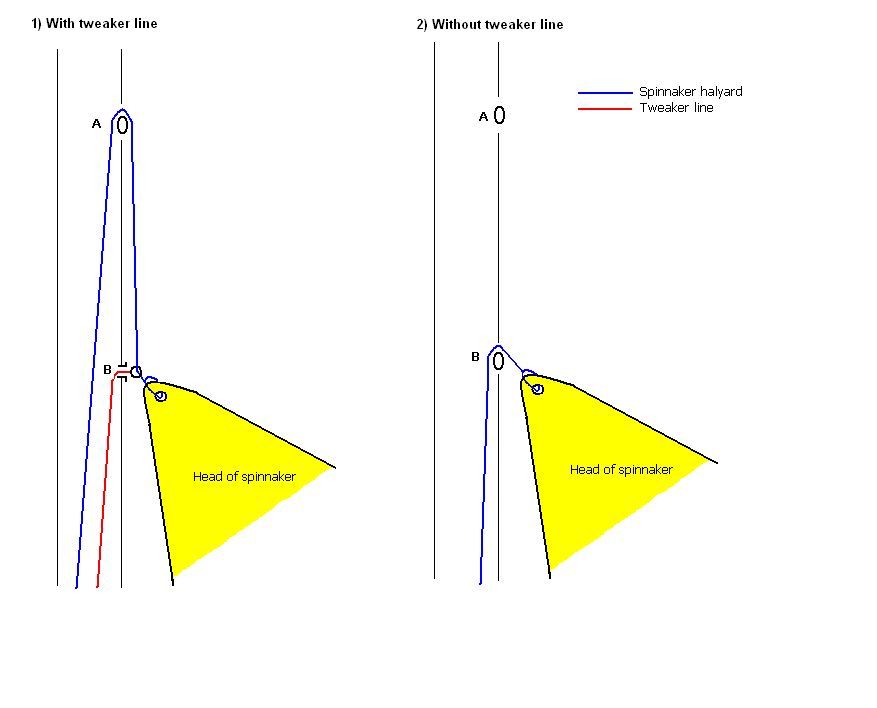
| 1. Keep spinnaker setting. | 1. Release check line knot from �V�. |
| 2. Pull tweeker line down mast. | |
| 3. Pull halyard up. | |
| 4. Take pole off and stow on boom. | 4. Take leeward spinnaker sheet and set kite in reaching mode or if you are dropping in a panic make sure there�s tension on the sheets (i.e. not flapping). |
| * If the crew is sat on windward gunwhale we find there is less disturbance in the boat if the helm passes the pole to the crew. Prior to this the crew is keeping the spinnaker filled with an arm held out. |
Easy really - but here are some more tips from our experience:
Troubleshooting:
1. If kite ends up twisted around the sprit, or the downhaul or sheets fall over the sprit then send crew onto foredeck.
2. If clew gets into chute before the head and it is stuck, relaunch and try again, keeping some tension on the sheet while dropping.
3. If using the continuous elastic system take care not to twist the pole over so that a loop is formed in the elastic on the ring.
Deciding which side to set:
1. A burgee is particularly useful in deciding which side to set the spinnaker and vital for knowing when to gybe when it is windy.
2. Aim to set the spinnaker on the windward side of the boat. The spinnaker will not fill well if the mainsail is "by the lee".
3. If you are heading back to a leeward mark that you have just beat up from then expect to be on the opposite tack to the longest tack of the beat.
Dropping and hoisting in Running Mode:
1. Dropping in Running mode is a fairly high risk strategy. It is very easy for the sheets to fall in front of the sprit and usually at a time when the leeward mark is fast approaching!
2. Some boats do hoist directly into running mode. It seems to be important not to let the sheets loose so they fall over the front of the sprit.
Tactical Implications:
1. Running down on port tack, especially amongst other boats that are gybing downwind leaves you with few, if any, rights of way. Starboard tack running boats should still be aware that they will usually have to give way to starboard tack boats gybing downwind as these boats will have luffing rights.
2. With the continuous elastic system it may be less easy to "crash-gybe" than with a free pole.
Things in the water!
1. We have the centreboard 3/4 up in light weather and as far up as we dare when windier. It is a good idea to put it down before manoeuvres -gybes etc.
2. Don�t leave pole dragging in the water for too long (e.g. in the middle of a gybe) as it works well as a brake.
3. With loose pole, recommend only dropping pole overboard when being followed by someone who will pick it up for you. It does seem to float for some time though.
Good Luck
Harry Roome


